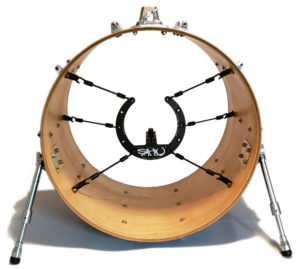
The following guide covers internal installation of The Kelly SHU Composite™ Series Microphone Mounting System inside a 14 inch rack or floor tom. If you choose to use The Kelly SHU Pro™ Series inside your toms, installation would follow the same procedure.
Having your microphone inside the rack tom drums reduces cross bleed on loud stages and you can conveniently transport the drum with the microphone in place. The Kelly SHU™ system will save you time during set up and tear down. In addition, eliminating the microphone clamp or mic stand also reduces your stage clutter and gives you back some of your riser space.
Installation of the system does not choke the drum and after installation and set-up, the drum’s original resonance is almost entirely maintained.
NOTE: If your drum is a 16 or 18 inch diameter, we have a chart at the bottom of this page listing support cord lengths for those size drum shells. Installation procedures will be the same as listed here.
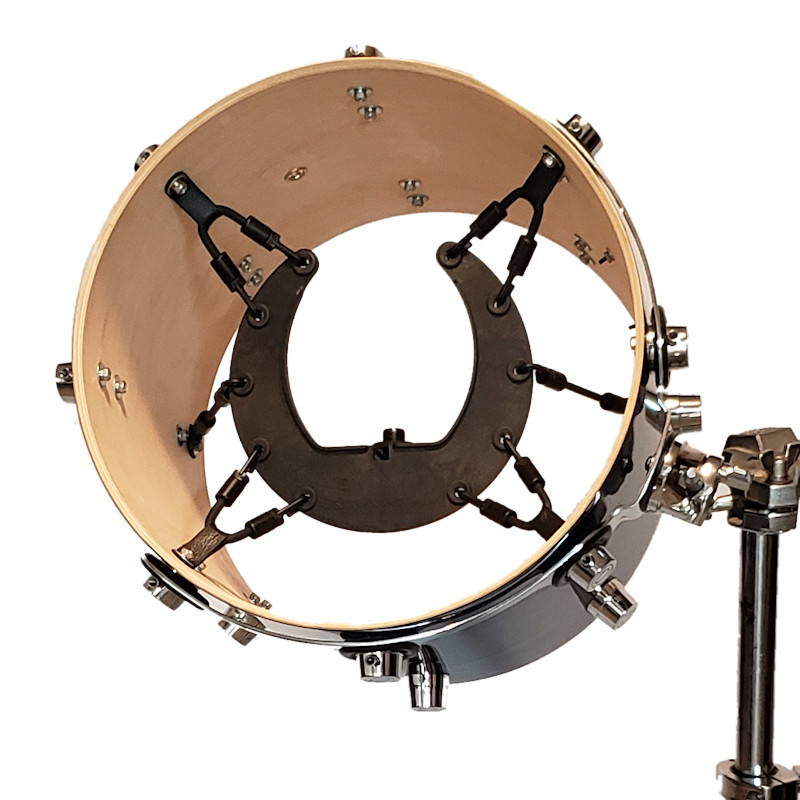
Kelly SHU™ systems will easily fit inside tom drum shells which are 14 inches in diameter or larger.
The drum used for this installation guide is an 8 lug, 14 inch diameter, 12 inch deep drum shell. The mounting unit will be suspended by a 6 total shock absorbing isolation cords. Before beginning your installation, it is recommended you remove both drum heads to gain complete access to the interior of the drum shell. We also advise users to determine their method of getting the XLR Microphone cable out of the drum once the Kelly SHU™ system is in place. Our No-Drill Kelly SHU PLUGZ™ System is designed for this use however, you may have your own wiring system in mind. If your drum is a concert tom or gong drum without a resonant head, XLR cable access will not be an issue.
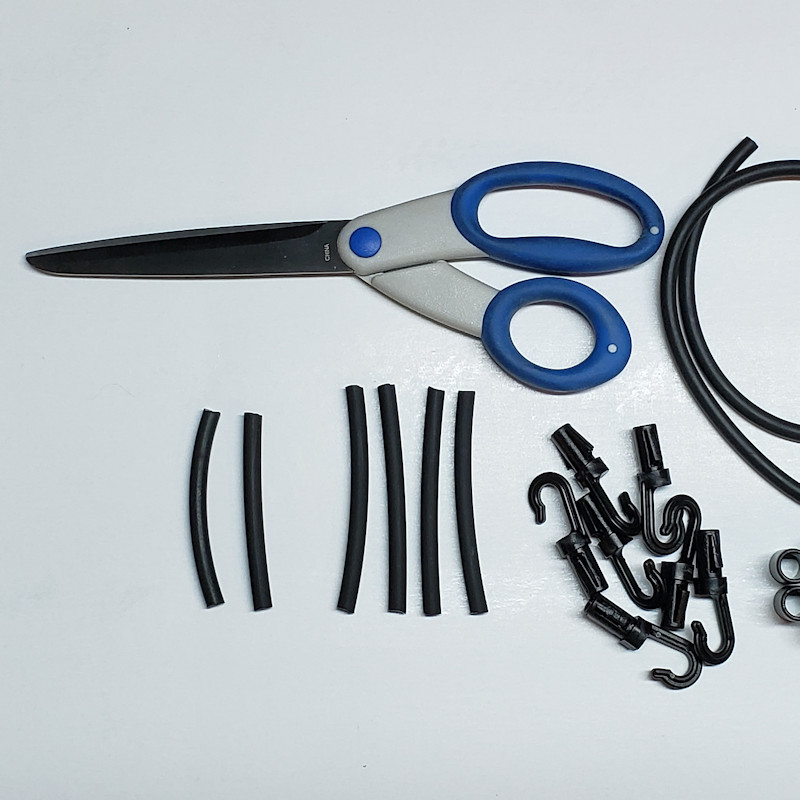
Build Your Support Cords.
Build Your Support Cords.
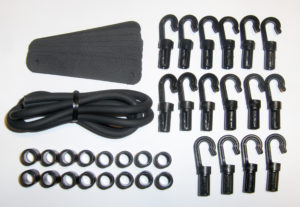
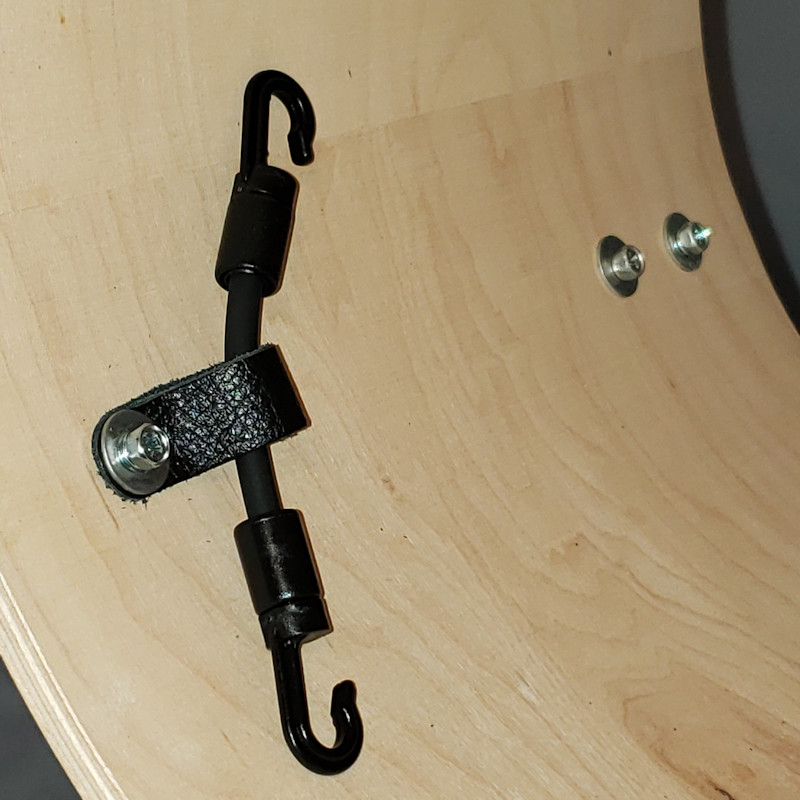
From the length of rubber isolation cord included with the Kelly SHU™ system, cut the following pieces off with a sharp pair of scissors:
4 pieces at 3.75 inches long (95 mm).
2 pieces at 3.25 inches long (82 mm).
Proceed to attach a Kelly SHU System hook (12 total) to each end of the pieces of support cord material that you just cut. Set aside for later.
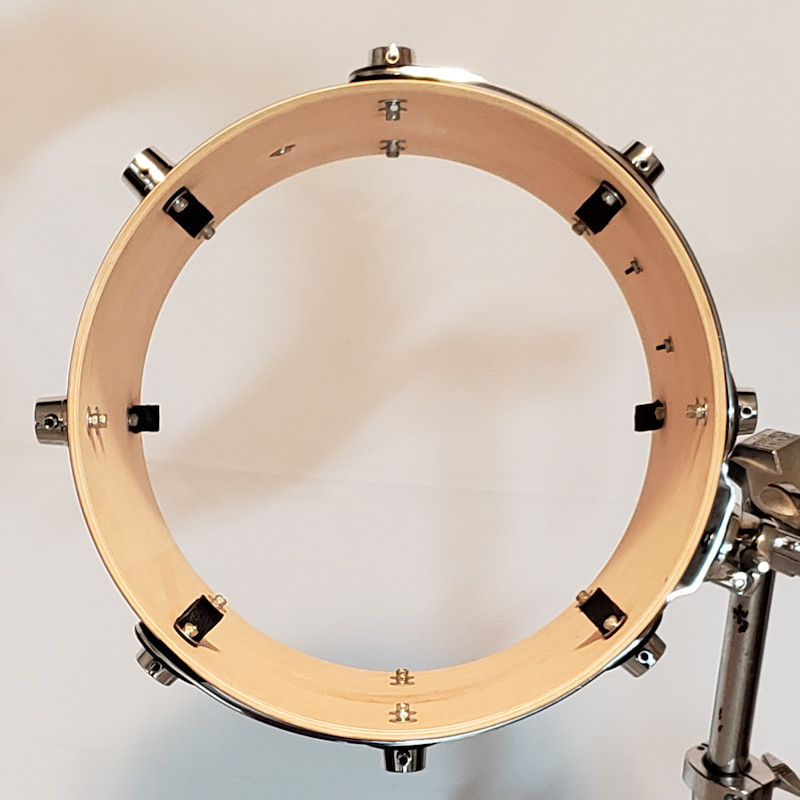
Install the Interior Leathers.
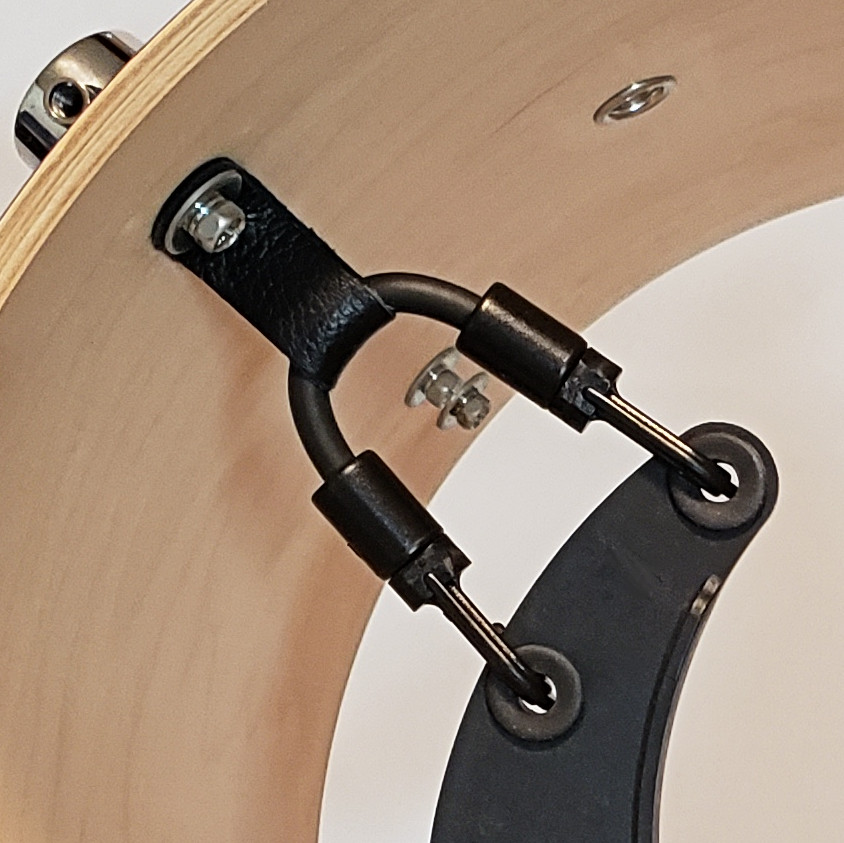
Locate the interior installation leathers included with the Kelly SHU™ system. Install 6 of the leathers in the positions shown here. To install the leather, remove the desired hardware screw, fold the leather in half and run the screw through the holes in the leather strip. Replace the screw into it’s original position and tighten firmly.
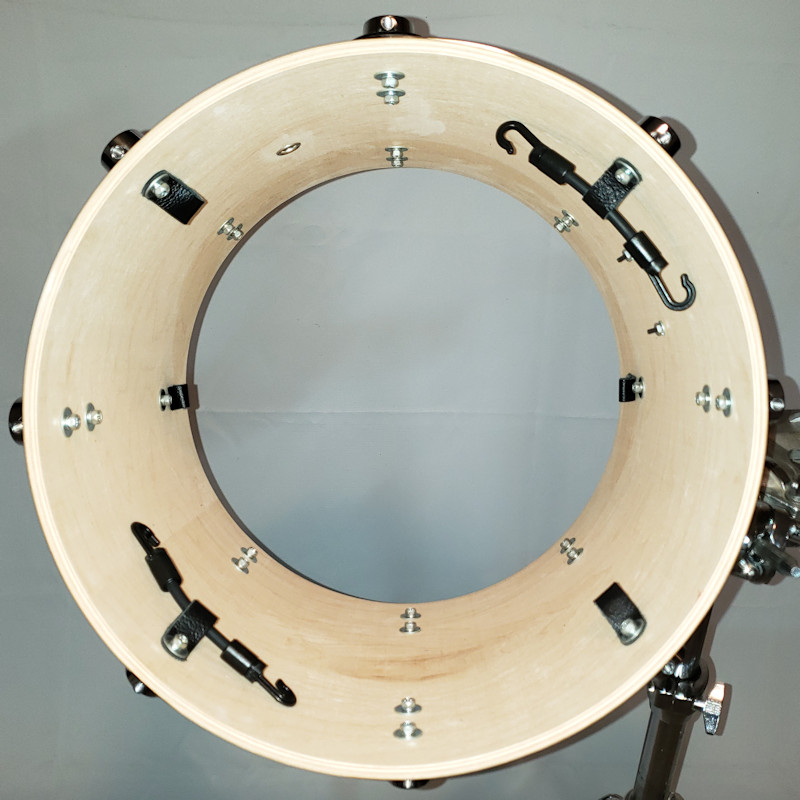
Install Two Support Cords.
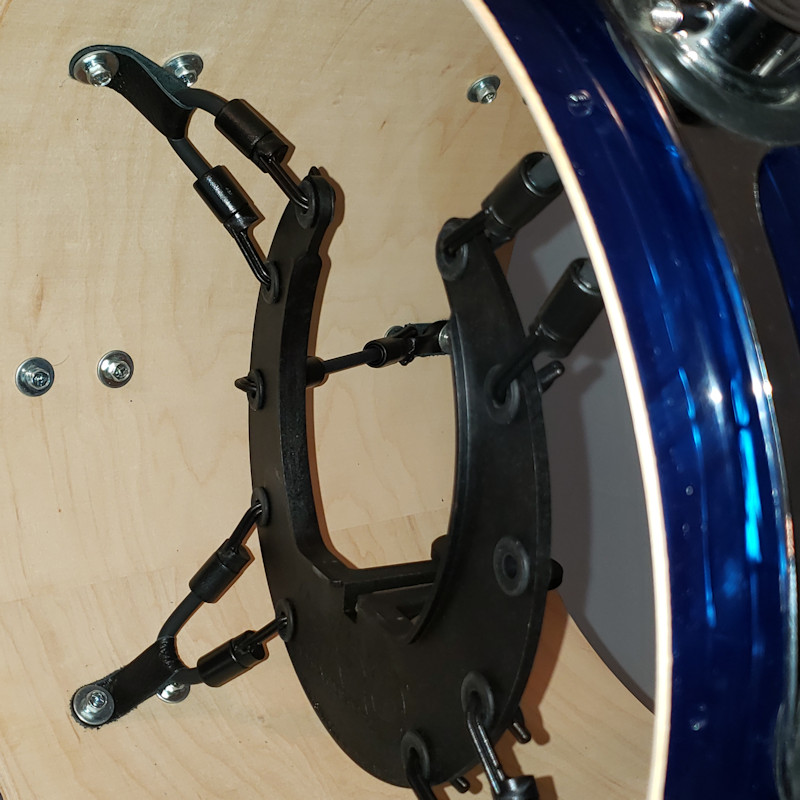
Using two of the Longest Kelly SHU™ system support cords that you built earlier, pass them through two of the leathers as shown here. The support cord hooks will fold back to engage into a hole apiece in the mounting unit.
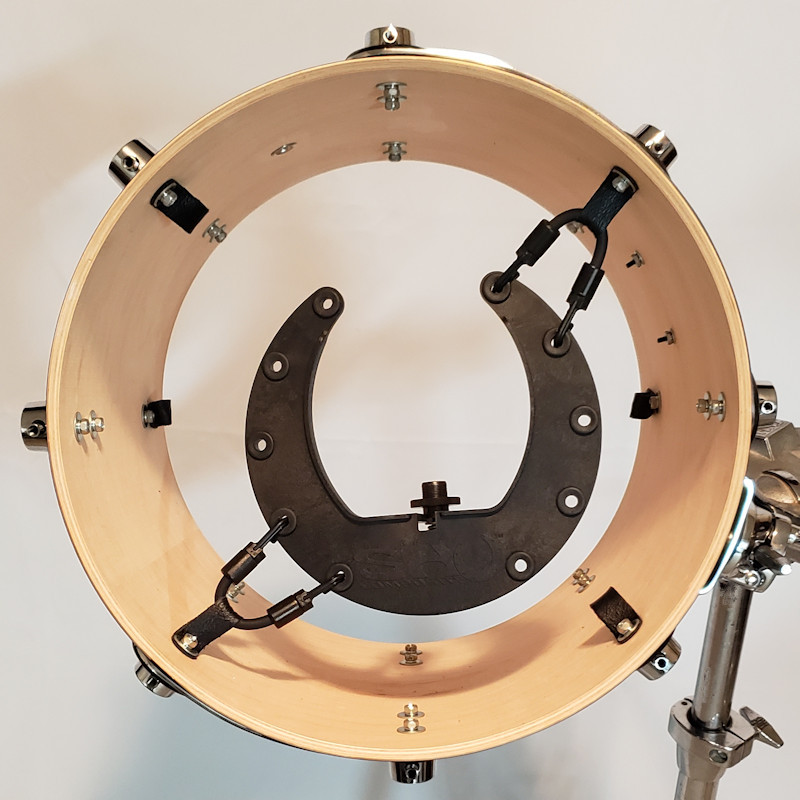
Connect To The SHU Mount.
Start your Kelly SHU™ internal installation by hooking each of the four available support cord hooks into their own holes in the SHU mount as shown here.
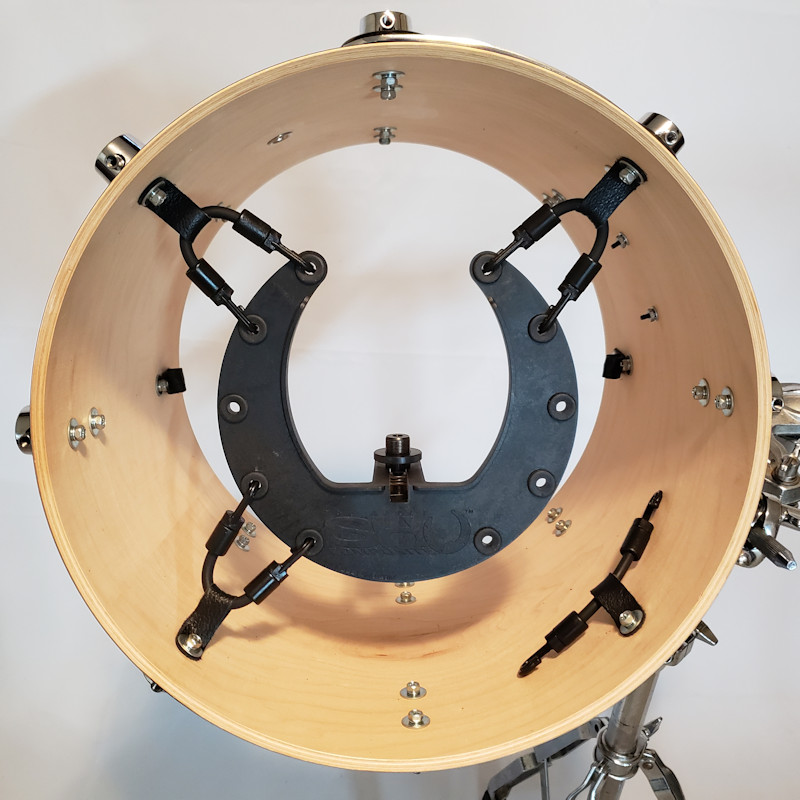
Install Two More Support Cords.
As in the previous step, pass the other two Longest Kelly SHU™ support cords that you built earlier through the opposite leathers. Hook the final four support cord hooks into the Kelly SHU™ mounting unit directly opposite the first ones. This leaves two holes open in the SHU mounting unit for the next step.
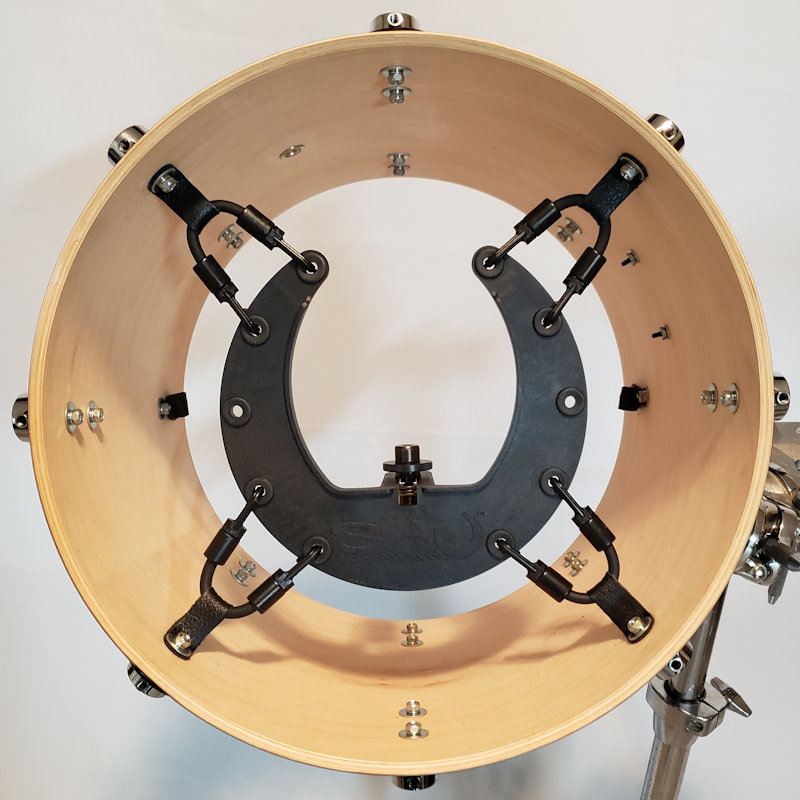
Connect The Hooks To The SHU.
Hook the final four support cord hooks into the Kelly SHU™ mounting unit directly opposite the first ones. This leaves two holes open in the SHU™ mounting unit for the next step. NOTE: The mounting unit may feel a bit spongy and loose here, however it will tighten up nicely when we add the remaining two support cords.
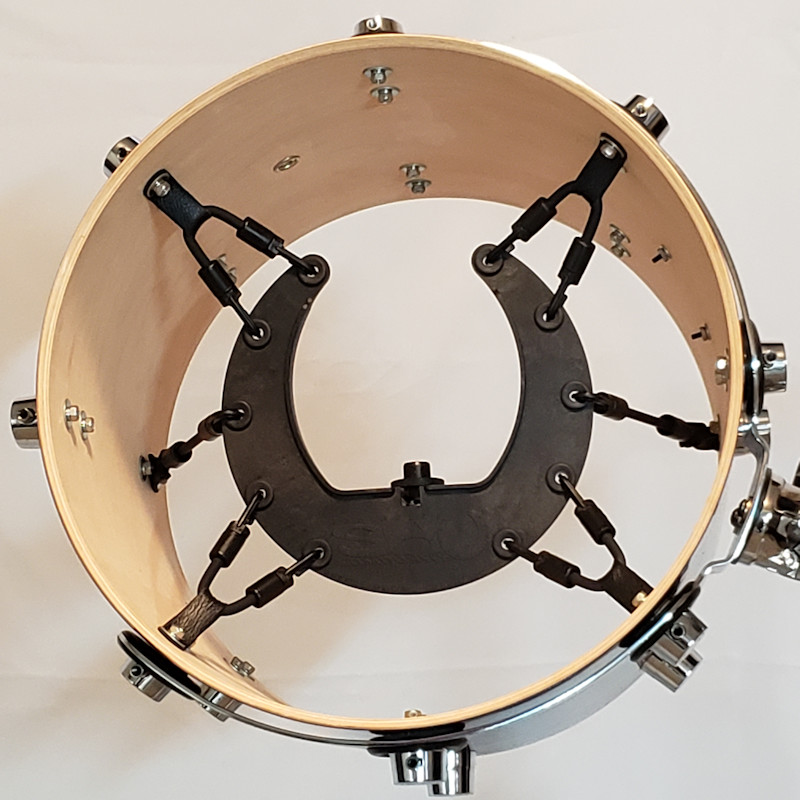
Firm and Stabilize the Installation.
Attach the remaining two support cords into the leathers on the far end of the drum shell, one per side. These two should be the two shorter cords you built earlier. While pushing the SHU™ mounting unit toward the center of the drum, engage the last two support cord hooks into the center holes on each side of the SHU™ mount as shown.
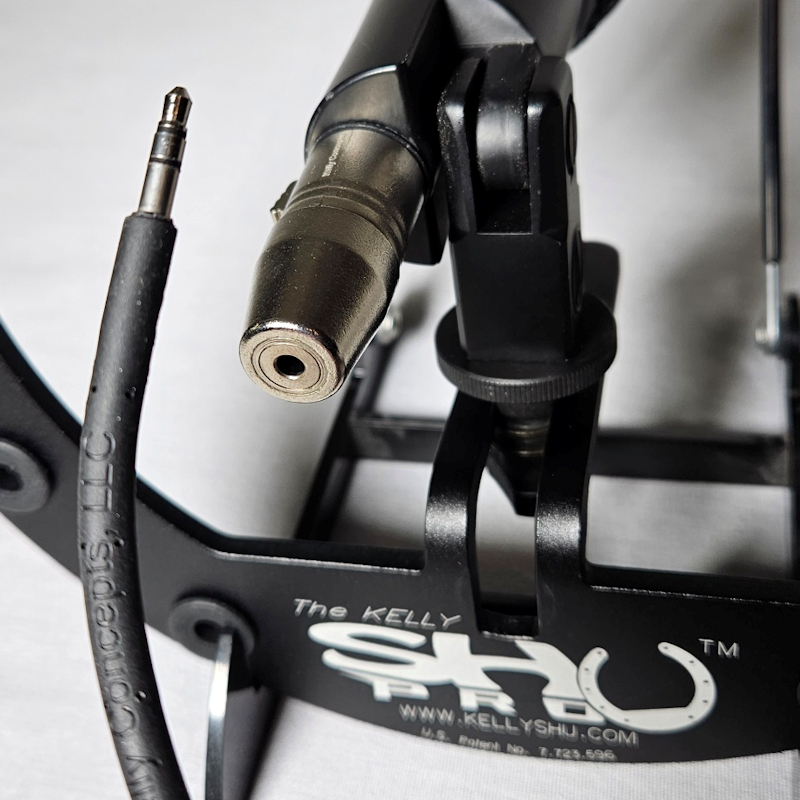
Use Your Favorite Tom Drum Microphone.
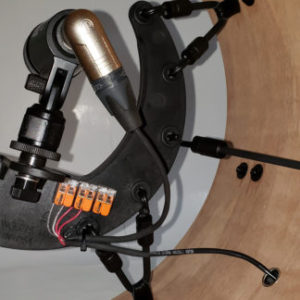
The SHU™ system is now ready to accept your tom drum microphone of choice. Mount the microphone on the SHU™ in your desired position and make sure everything is tight, secure and operational before closing the drum back up for tuning and play. If you are looking for a means to connect the microphone to your PA we offer our Kelly SHU PLUGZ™, a No- Drill Solderless XLR Connection System shown above. XLR System is purchased separately.
Support Cord Lengths for Drum Shell Sizes:
Lengths listed are for Support Cord Material ONLY. Excludes the additional length of the hook.
16- inch diameter drum shells:
- Primary Support Cords (x4) = 4 3/4 inches
- Secondary Support Cords (x2) = 3 7/8 inches
18-inch diameter drum shells:
- Primary Support Cords (x4) = 6 inches
- Secondary Support Cords (x2) = 5 1/4 inches
The Patented Kelly SHU™ Microphone Shock Mount System. Internal Tom Drum Miking Shock-Mounts.
RELATED LINKS:
Kelly SHU PLUGZ™ – Solderless No-Drill XLR Connector System
Kelly SHU Accessoryz™ – Male XLR Socket Installation Kits
Heil Sound, Inc.

