Pictorial installation guide for internal installation of The Kelly SHU™ System. This guide orients the SHU shock-mount unit in the center of the kick drum.
The following pictorial covers a standard center-oriented internal installation of The Kelly SHU Composite™ kick drum microphone mounting system inside a 22 x 16 inch kick drum shell.
There are countless ways to install the KELLY SHU™ Microphone Shock-Mount system to achieve your desired microphone placement. The most straightforward method of installation is to simply center the mounting unit inside the drum shell. Most desired microphone positions can be achieved from a center-oriented SHU mounting unit.
STEP #1 :
Prepare your drum shell for installation of the Kelly SHU™ by removing one or both of the drumheads.
Step 2# :
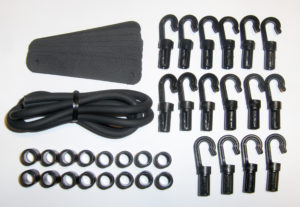
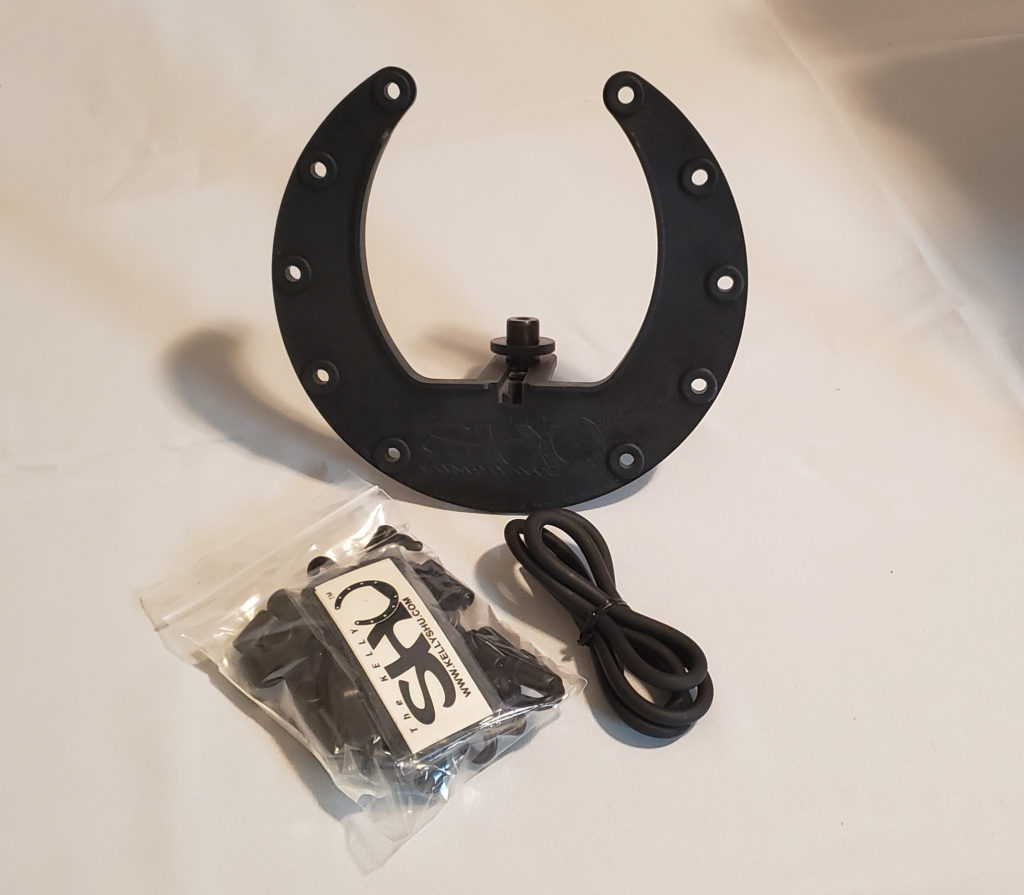
Remove the Kelly SHU™ Mounting unit and the included parts from the package.
STEP #3 :
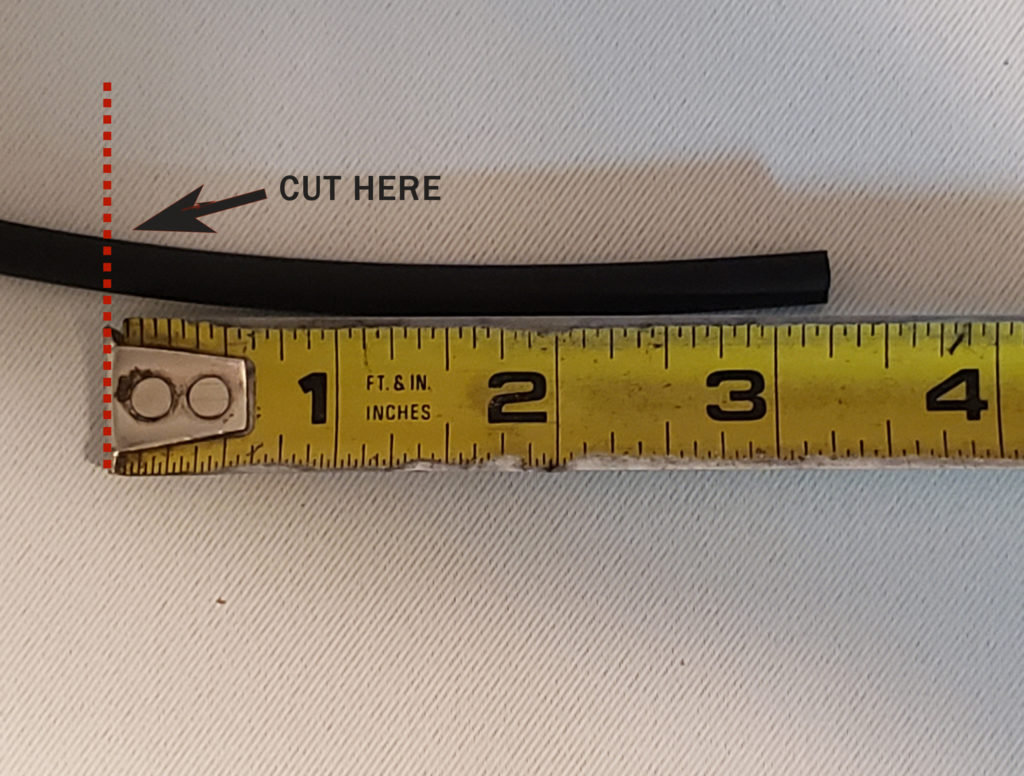
From the solid rubber support cord material included with the Kelly SHU™ System, you’ll need to cleanly cut 6 lengths of the material at 3 1/4 inches (89 mm).
TIPS: Use SHARP Scissors to cut the rubber material!
Any kinks in the rubber material will easily straighten out when the support cords are installed inside the drum.
STEP #4 :
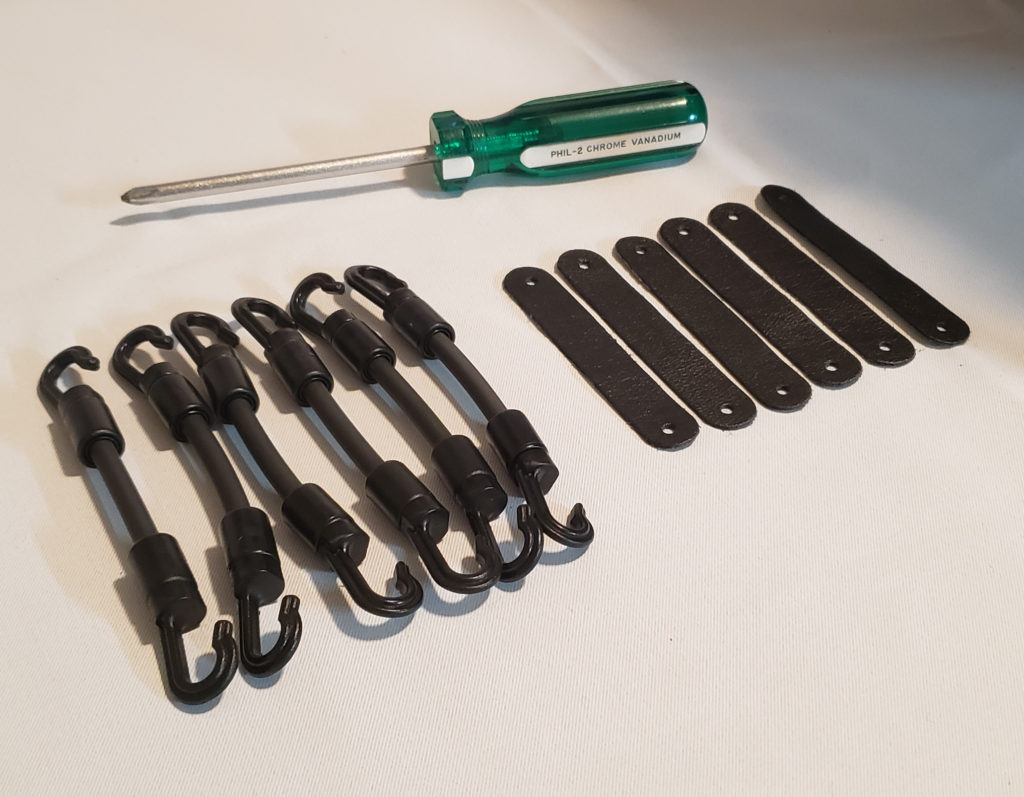
Install a Kelly SHU™ System hook on each end of the lengths of support cord by following the directions included with the system.
You’ll also need 6 of the interior leathers that are included with the system and a tool to fit your drum’s hardware screws on the inside of the drum to complete the next step.
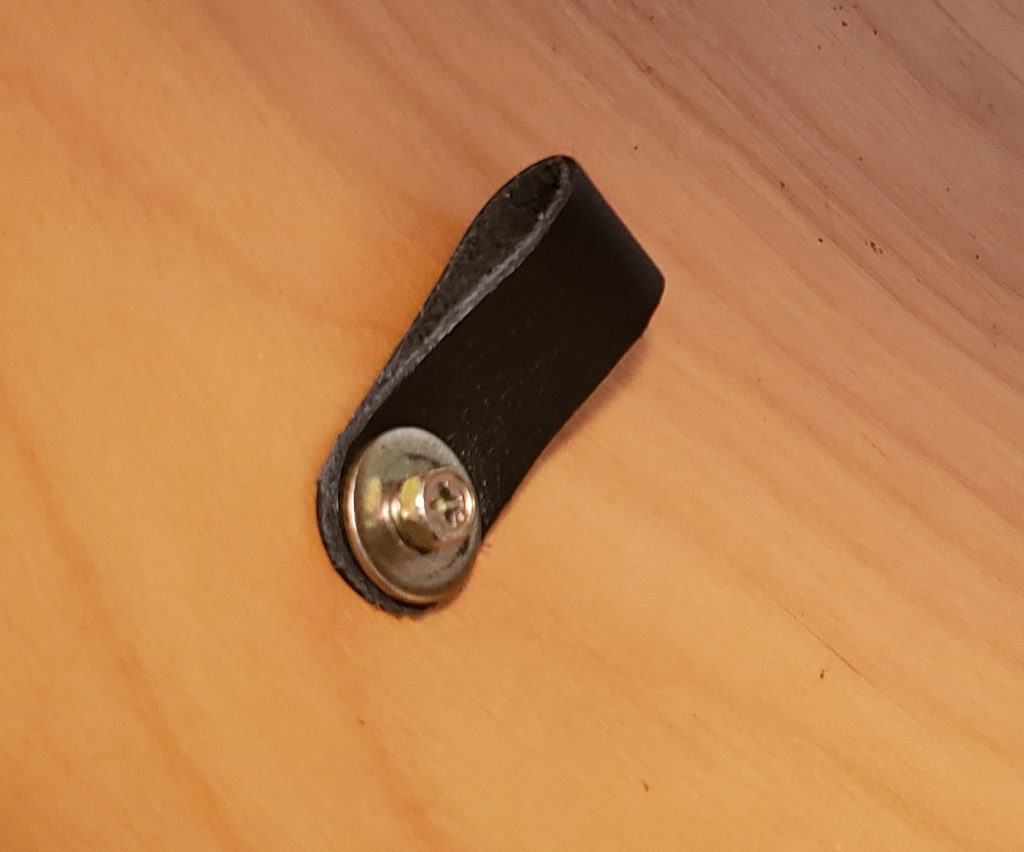
STEP #5:
To install the interior leathers on the inside of the drum, simply remove any of the hardware screws where you want an attachment point for a support cord, fold one of the leather strips in half and run the screw through the holes in the leather strip, replace the screw into the tuning lug and firmly snug the screw down. Repeat the process for as many leathers as you wish to install. Placement of the leathers for this outlined installation is covered in STEP #6.
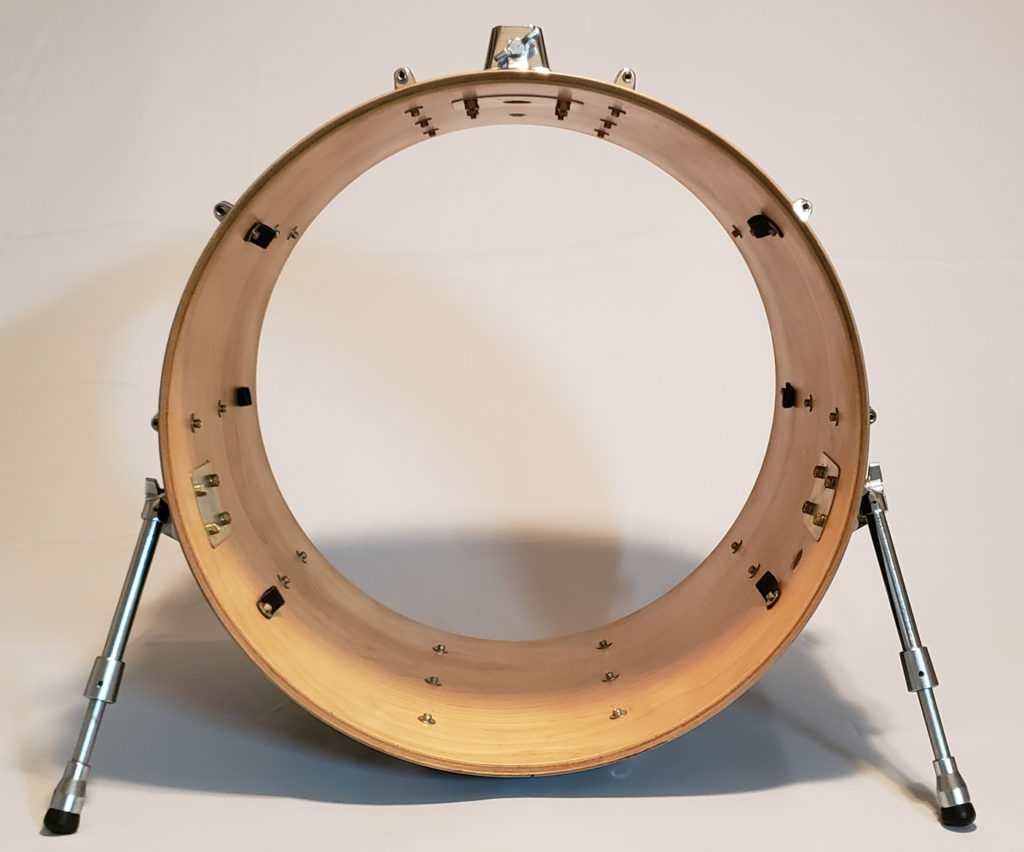
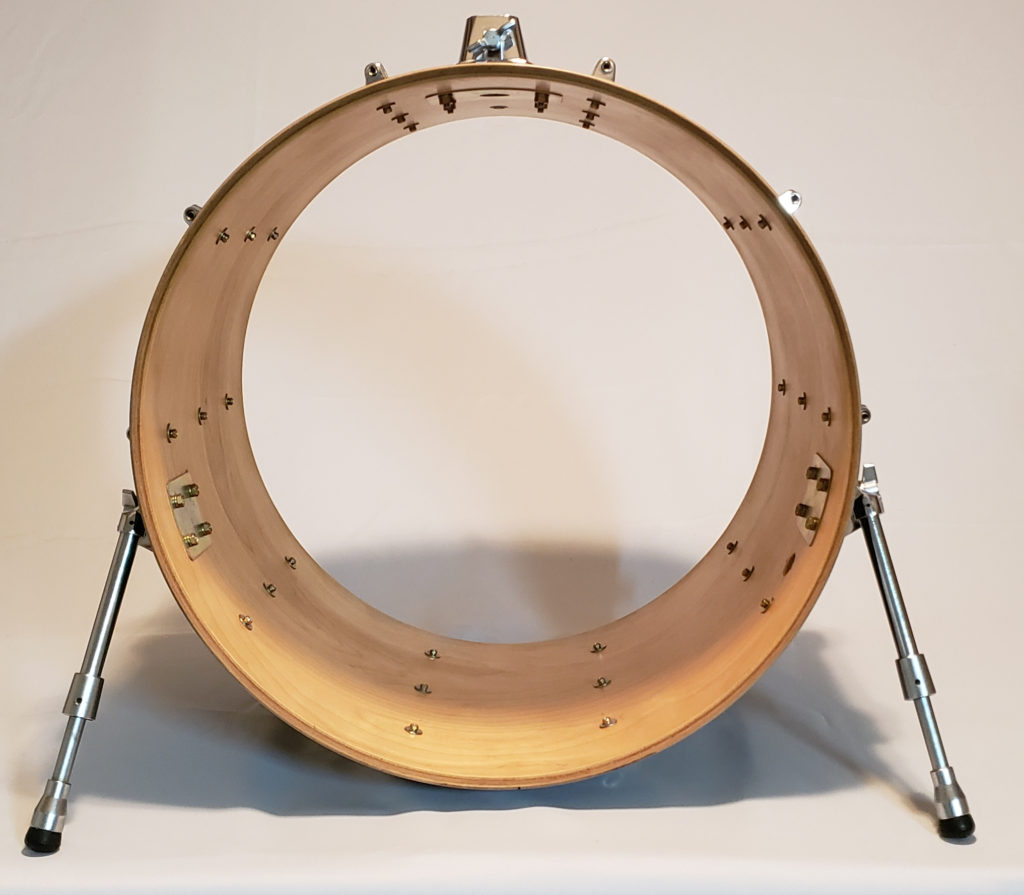
STEP #6:
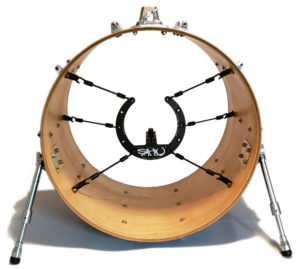
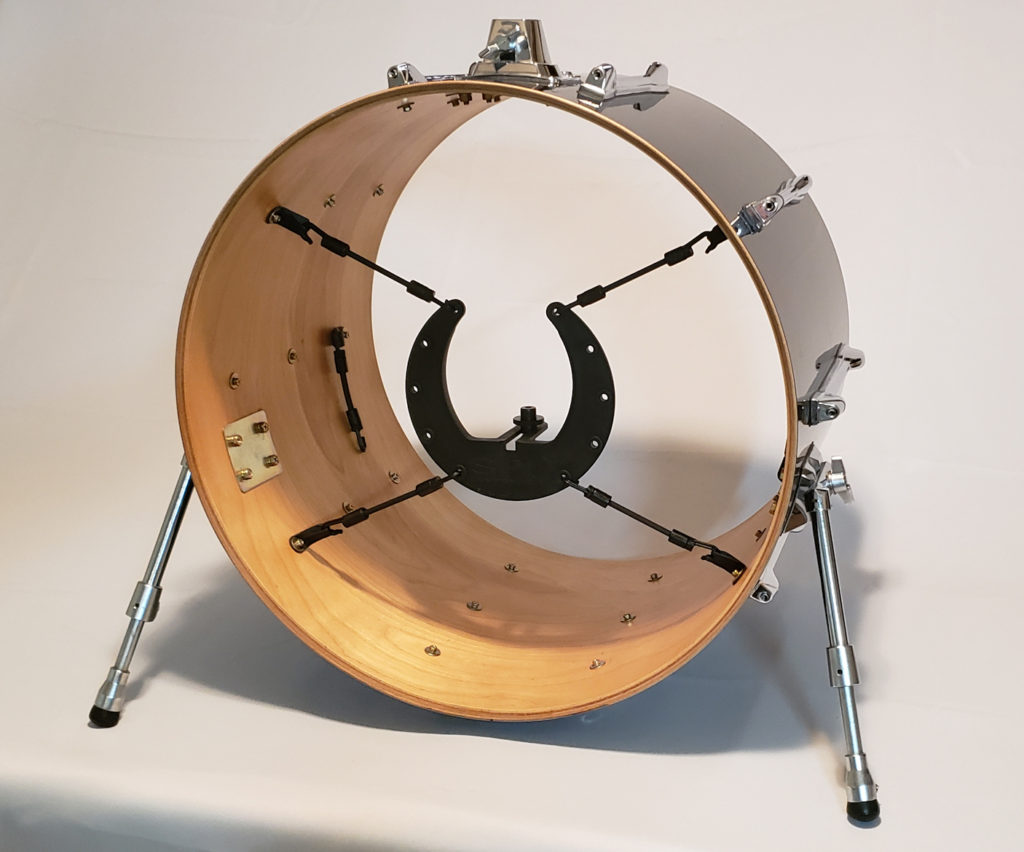
In the photo above, we have installed 6 of the interior installation leather loops. Four of these are located on the resonant end of the drum shell, the remaining two are installed on the batter end of the drum shell. Using this alternating method, The Kelly SHU™ mounting unit will be firmly held in place by not only the 360-degree tension provided by the support cords, but also in two different horizontal directions. This multi directional approach provides for a very stable, shock-mounted microphone platform.
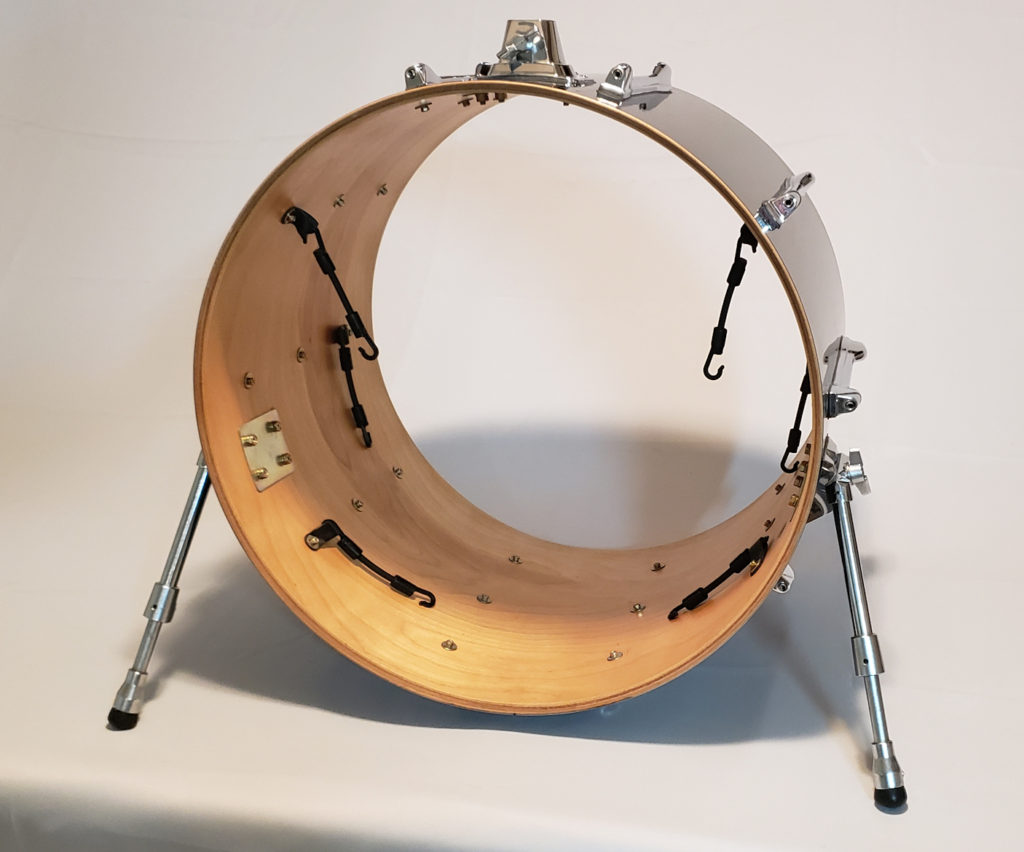
STEP #7:
The easiest way to attach the support cords to the Kelly SHU mounting unit is to first hook the support cords into the leather loops as shown here.
STEP #8:
We are now ready to install the Kelly SHU™ mounting unit. First, attach the two upper-most support cords into two of the top holes in the mounting unit.
STEP #8:
Next we attach the two lower support cords into the bottom holes of the Kelly SHU™ mounting unit. With these first 4 support cords engaged and in place, we will provide stability and rigidity to the mounting unit during the next step.
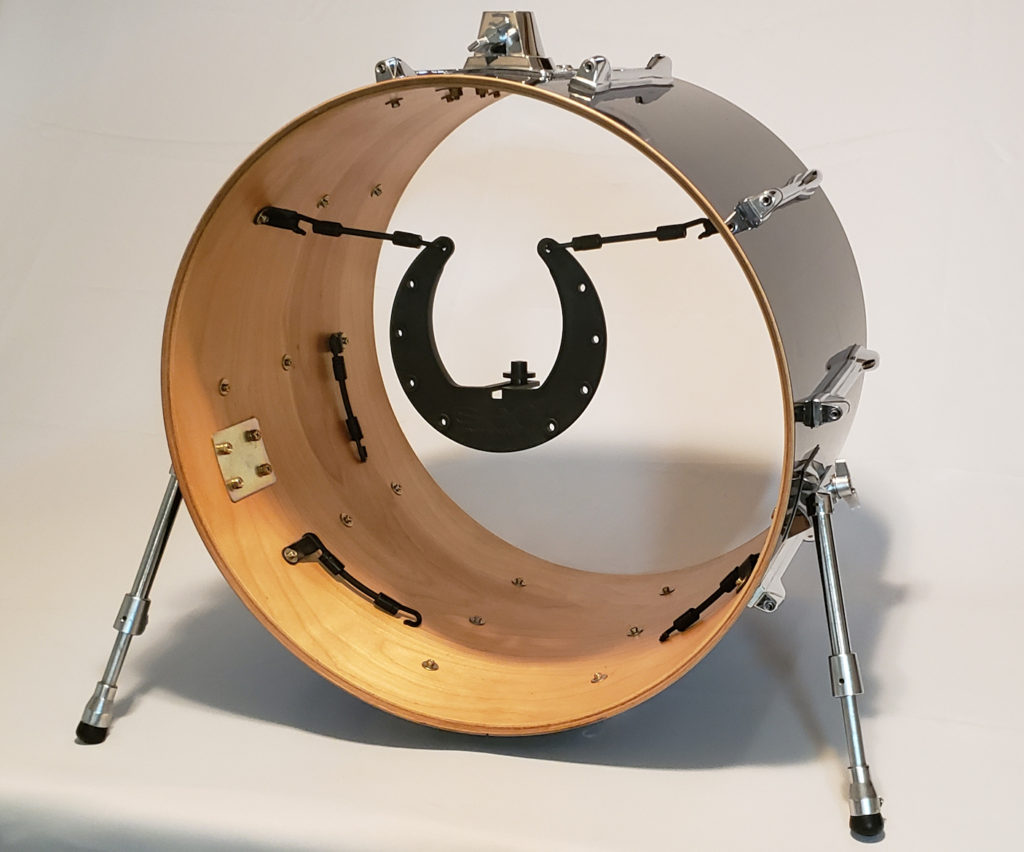
STEP #9:
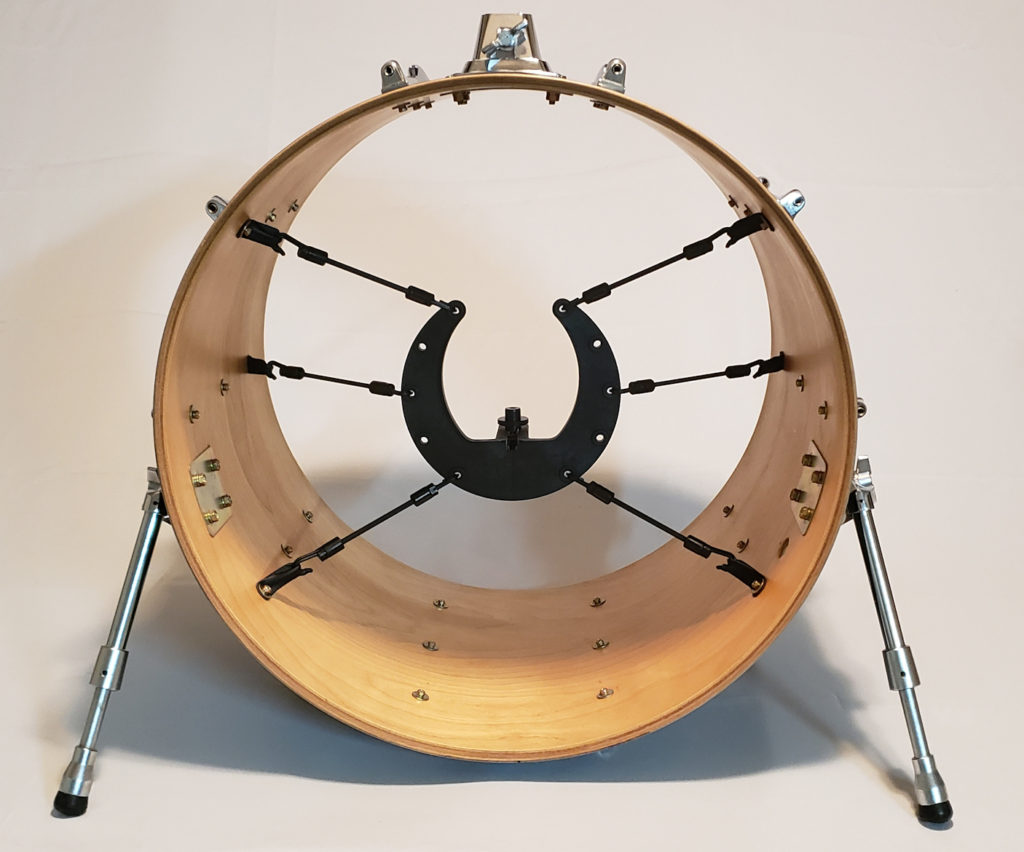
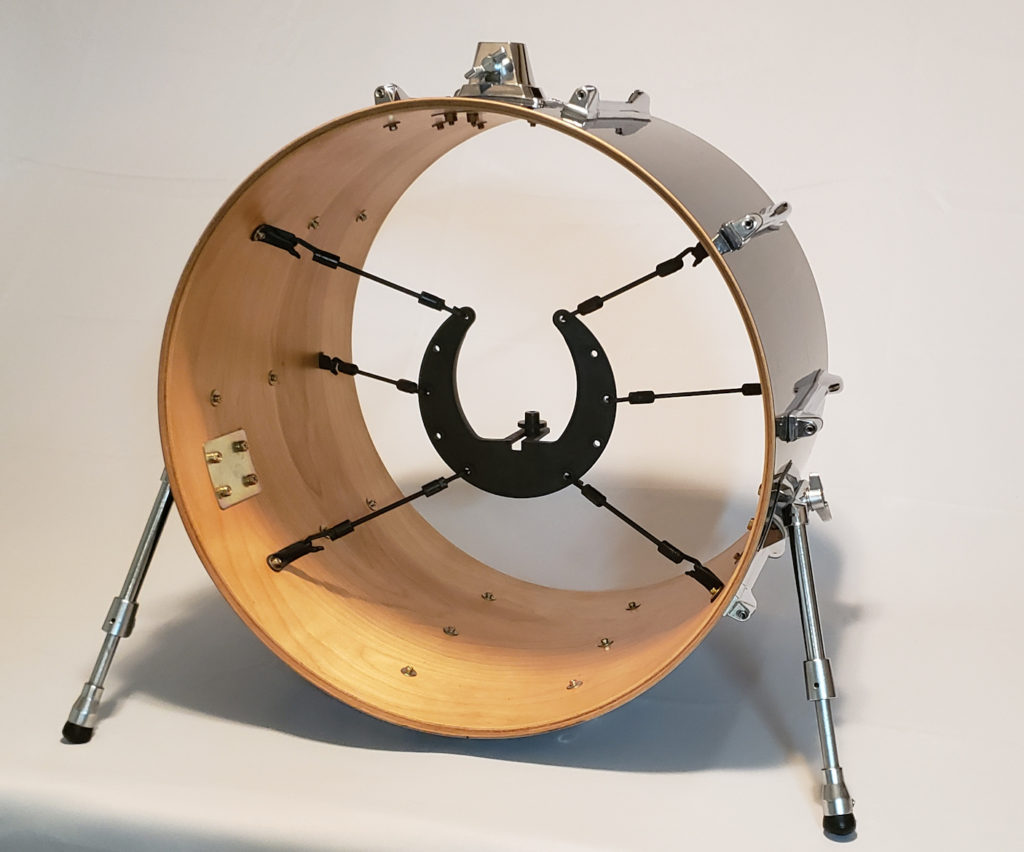
With a gentle push, move the mounting unit toward the center of the drum shell while stretching each of the two remaining support cords to the mounting unit. Engage these support cords into the center holes of the Kelly SHU™ mounting unit.
STEP #10:
Installation of the Kelly SHU™ mounting unit is now completed to a satisfactory standard. The center-oriented installation outlined in this guide will support most any kick drum microphone on the market. The threaded post for the microphone or microphone clip is USA industry-common 5/8″-27 thread count.
NOTE: For larger and heavier kick drum microphones, such as EV RE20, Shure BETA 52A, Audio-Technica AT2500 and some others, we recommend installing the Kelly SHU Pro™ series, which features our ultra-robust machined aluminum mounting unit.
ROTATING THE MOUNTING UNIT and/or AIMING THE MICROPHONE CAPSULE USING THE STAND KNOB are two ways to adjust the microphone’s position, response and polar pattern. From this centered position, you can still achieve off-center microphone performance by simply aiming the microphone off-axis.
Experimentation is key to achieving your desired placement of the microphone. Once your microphone is settled into its sweet spot, the unit and microphone combination will not shift from position during travel or performance given everything like the stand knob, Kelly SHU™ jam nut and adjustment knob are tight and secure.
EV, Electro-Voice, RE20, Audio-Technica, AT2500, SHURE, BETA 52, and BETA 56 are trademarks of their respective owners, registered in the U.S. and other countries. Neither Kelly Concepts, LLC nor its products are authorized, sponsored, or approved by, or affiliated with, any of these aforementioned brands or trademarks.